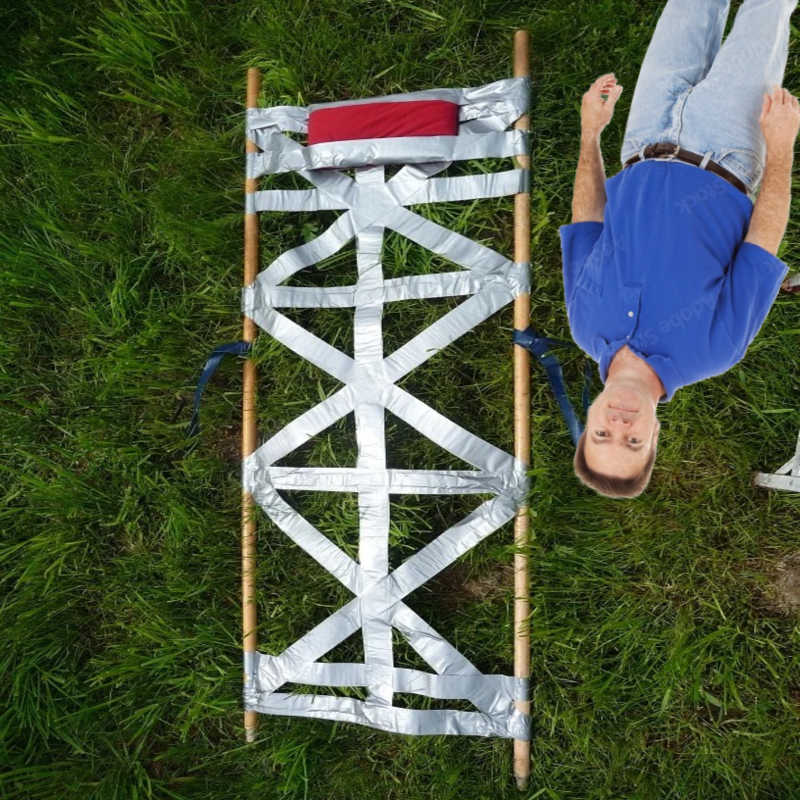
How to Build an Emergency Litter or Stretcher in a Survival or Wilderness Situation
In a survival or wilderness emergency, the ability to transport an injured person quickly and safely is absolutely crucial. Whether you're deep in the backcountry or caught in a disaster zone, knowing how to build an emergency litter or stretcher could be the skill that saves a life.
In this detailed guide, we'll break down the difference between a litter and a stretcher, show you how to build both with minimal gear, and help you decide which is best for your bug-out or rescue plan.
Litter vs Stretcher: What’s the Difference?
Although often used interchangeably, litters and stretchers have key differences that matter in survival scenarios:
-
Stretcher: Typically refers to a flat, fabric-based platform supported by two poles. It’s ideal for even terrain and relatively short evacuations.
-
Litter: A more advanced structure that includes side supports or even restraints, sometimes resembling a basket. It offers better protection and immobilization for long-distance or vertical transport.
Keyword Note: The "litter vs stretcher" comparison matters in both civilian and military rescue contexts, and ranks well on Google for preppers, first responders, and bushcraft enthusiasts.
Why You Might Need a Litter or Stretcher
Emergencies that may require patient transport include:
-
Hiking or hunting accidents
-
Earthquakes, floods, hurricanes
-
Military or evacuation scenarios
-
Medical emergencies without access to EMS
If a person is immobilized or unconscious, building the right transport system ensures they stay stable and safe while reducing risk to rescuers.
Key Features of a Survival-Ready Transport System
When choosing or building a litter or stretcher, keep these principles in mind:
-
Strength: Must support the victim’s full body weight.
-
Stability: Prevents additional injury from excessive motion.
-
Comfort: Avoid sharp edges or friction points.
-
Portability: Must be easy enough to carry over rugged terrain.
How to Build a Survival Stretcher with Minimal Gear
1. Pole and Fabric Method (Classic Stretcher)
Best For: When you have gear like tarps, jackets, or a tent.
Materials:
-
2 strong poles (6–7 feet long)
-
Tarp, canvas, blanket, or rope
Steps:
-
Lay the fabric flat.
-
Place poles parallel, shoulder-width apart.
-
Fold the fabric over the poles.
-
Secure with knots or tucks.
-
Test with weight before use.
2. Rope & Stick Weave (Improvised Stretcher)
Best For: When you have cordage but no fabric.
Materials:
-
2 poles
-
Small sticks
-
Paracord, rope, or vines
Steps:
-
Lay poles parallel.
-
Weave rope in a crisscross pattern.
-
Insert sticks into the weave.
-
Lash tightly at all contact points.
3. Jacket or Backpack Stretcher (Fastest Option)
Best For: Urban emergencies or bug-out bags.
Materials:
-
2 poles
-
2+ backpacks or zippered jackets
Steps:
-
Slide backpack straps or jacket sleeves over poles.
-
Ensure balanced spacing.
-
Zip jackets for a stable surface.
4. All-Natural Vine and Branch Litter
Best For: Deep wilderness with zero gear.
Materials:
-
2 main branches
-
Cross branches
-
Vines, saplings, or grass
Steps:
-
Lay frame with large branches.
-
Place crosspieces to form a base.
-
Lash tightly with natural fiber cordage.
When a Full Stretcher Isn't an Option: Quick Carry Methods
If you lack materials or need to move quickly:
-
Fireman’s Carry: Fast for a single rescuer, though tiring.
-
Two-Person Seat Carry: Good for conscious victims.
-
Hasty Drag: Use clothing, a poncho, or ground tarp to drag.
These methods are riskier but can save time when terrain or urgency matters most.
Survival Transport Safety Tips
-
Stabilize injuries before moving.
-
Communicate with the victim.
-
Take turns carrying.
-
Stay hydrated and watch for fatigue.
-
Keep the patient warm.
Gear Recommendations from Better Bushcraft
Want to be truly ready? Stock up on these essentials:
-
[Black Beard Paracord Lanyard Ferro Rod] – For crafting natural lashings and starting campfires.
-
[Pure2Go Water Filters] – Keep both rescuer and victim hydrated.
-
[Silky Saw BigBoy 2000] – Cut stretcher poles fast in dense brush.
-
[Osight X Optics Bundle] – Spot rescues faster with improved visibility.
All of these are in-store now at Better Bushcraft — swing by and gear up.
Final Thoughts: Litter vs Stretcher in Real Survival
If you’re building a minimalist survival kit or planning for grid-down disaster response, the choice between a litter and a stretcher matters.
Stretchers are faster and easier with basic gear. Litters offer more patient stability and are ideal for rugged or vertical evacuation.
The best option? Train for both. A prepared survivalist adapts, improvises, and overcomes.
Ready to get hands-on with your survival gear? Visit Better Bushcraft in-store or online for the tools, training, and gear that make the difference when it matters most.
Stay sharp. Stay ready.
#littervsstretcher #SurvivalGear #BetterBushcraft #EmergencyEvacuation #WildernessRescue

