


When you're deep in the backcountry or caught in a survival situation, your GPS may die, your phone might be out of service, and a compass? That’s assuming you remembered to pack one.
But nature doesn’t care if you're lost—and that's where your know-how comes into play. Fortunately, making an improvised compass with common materials is not only possible—it’s easier than you might think.
In this guide, we’ll show you how to craft a functional DIY compass with minimal tools. Whether you’re in the woods, stranded after a hike, or just brushing up on your survival skills, this trick could literally point you in the right direction.
An improvised compass is a homemade navigation tool that helps you determine magnetic north using magnetism and buoyancy. Typically crafted from basic materials like a needle, water, and a floating object, it’s a lifesaver in emergencies when conventional navigation tools aren't available.
In any wilderness or crisis scenario, knowing where you’re going is critical. Disorientation leads to wasted energy, panic, and risk. When tech fails or isn’t available, natural navigation skills become essential.
An improvised compass allows you to:
Regain your sense of direction
Navigate toward landmarks or civilization
Stay oriented during overcast or low-visibility conditions
Avoid walking in circles (a common problem when lost)
A small piece of ferrous metal (a sewing needle, pin, safety pin, or even a paperclip)
A magnet or a substitute (can be a piece of natural lodestone, a battery, or even your hair in a pinch)
A leaf, cork, or thin plastic piece (acts as a float)
A container of water (a puddle, cup, or hollowed-out rock filled with water)
Optional but helpful: a bit of cloth or fur to assist with magnetization.
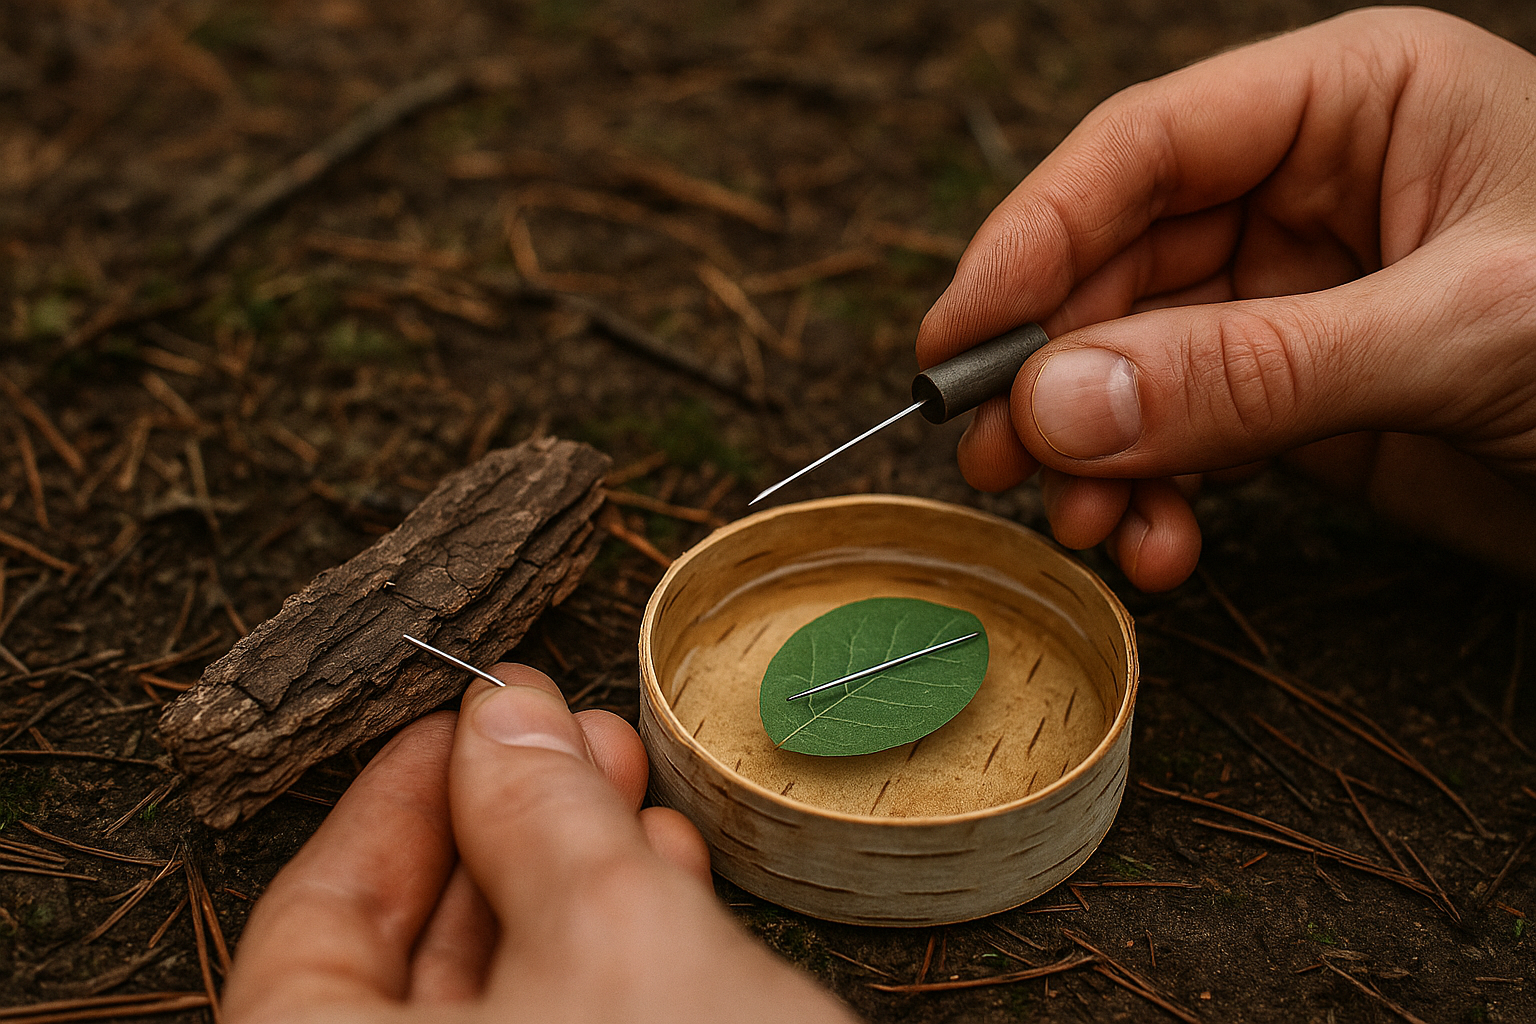
Above: A clear demonstration of how to magnetize a needle, prep a float, and use water to let it align with Earth's magnetic field.
Your first step is sourcing a small piece of metal that can be magnetized. Ideally, it should be ferrous (iron or steel-based). Common options include:
Sewing needle from a basic survival kit
Safety pin from a first aid kit
Paperclip from a notepad or wallet
Even a small fish hook (de-barbed for safety)
Survival Tip: If all you have is a multi-tool or knife, you can gently shave off a small sliver of steel for this purpose.
This step turns your basic needle into a makeshift compass needle.
If you have a magnet (from a flashlight, radio, or small battery-powered device):
Rub the magnet along the needle 50-100 times in one direction.
This aligns the electrons, giving it magnetic polarity.
If you don't have a magnet:
Rub the needle vigorously with silk, fur, or even your hair in one consistent direction for a few minutes.
You can also strike the needle against a rock (not ideal, but it creates a weak magnetic field).
Rubbing the needle across the positive terminal of a battery is another field-tested trick.
Note: The stronger and more consistent your strokes, the better your magnetization.
You’ll need something to keep the needle afloat and let it spin freely. This should be light, non-metallic, and flat.
Great field options:
A leaf (broad and buoyant, like from a maple or oak)
A small disc of bark
Cork if you have it (from a fishing bobber or bottle)
Plastic from a wrapper or bottle cap, trimmed to size
Cut it to about the size of a coin, ensuring it lays flat on water.
Place the needle on top of your float. Then, gently place the float on calm water in a bowl, puddle, cup, or depression in a rock.
Avoid moving water or strong wind.
If needed, build a makeshift bowl using waterproof materials (banana leaves, plastic bags, or even your hands cupped together if desperate).
The needle, now magnetized, will align itself with Earth's magnetic field.
One end will point toward magnetic north, the other to magnetic south.
Now comes the big question: which end is actually pointing north?
Use the Sun: In the Northern Hemisphere, the sun rises in the east and sets in the west. At noon, the sun is generally in the south—so the opposite is north.
Use a Watch: Point the hour hand at the sun. The midpoint between the hour hand and 12 o’clock is south (north is the opposite direction).
Check Landmarks: If you know the general location of a mountain range, coastline, or river system, align your compass with that for reference.
Improvised compasses can be used for:
Orienteering back to a trail or road
Navigating out of the woods
Map reading when your map lacks orientation
Signaling direction in group survival situations
Don’t use moving water—it disrupts the balance.
Don’t touch the needle once it’s floating—it can demagnetize quickly.
Don’t assume your compass is still accurate after several hours—re-magnetize it regularly if you're moving over time.
Make multiple needles and store them in your kit.
Combine with natural navigation techniques (sun, stars, moss growth).
Store a real magnet in your survival gear—lightweight and useful.
Consider packing a compact compass, but always learn how to make one.
Yes—with proper magnetization and still water, this method works reliably. Is it accurate to the degree? No. But in a survival situation, you don’t need pinpoint navigation—you need a general direction. This gets the job done, and that might just save your life.
Equip yourself now—so you’re never caught unprepared later.
An improvised compass is one of those clever survival hacks that should be taught in school. It’s simple, it’s useful, and best of all, it requires only basic materials and a little know-how.
Whether you’re a hardcore survivalist, a bushcraft enthusiast, or someone who just enjoys a weekend hike, this is a skill worth mastering. With a little practice, you’ll never fear getting lost again.