


In this article we are going to be focusing on Land Navigation.
Figuring out where you are and more importantly, where you got to go is a crucial skill that needs to be practiced, maintained, and taught in order to produce the best possible outcome for you and others around you...Survival.
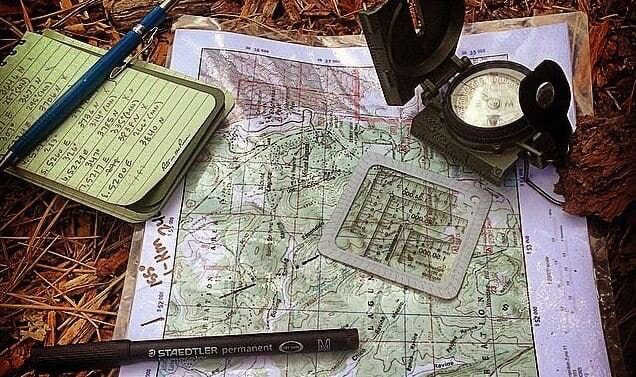
We will over some basic Land Navigation tools everyone should have in their kit we will cover. The List is short but in depth and designed to give you the tools and knowledge needed to apply them to real world scenarios.
Compass: A compass is essential for determining direction and orienting your map.
Map: Always carry a detailed topographic map of the area you're exploring. Topographic maps show elevation changes, landmarks, and important features.
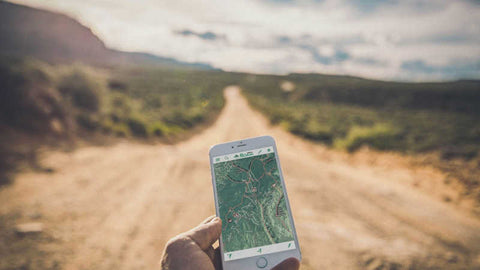
GPS Device (optional): While traditional navigation methods are crucial, a GPS device can be a helpful backup, providing accurate coordinates and tracking your route.
When Utilizing a Compass some basic things to consider are
Parts of a Compass: Understand the components of a compass, as mentioned in the previous response.
Magnetic Declination: Be aware of the difference between true north and magnetic north. Some compasses allow you to adjust for this declination.
Taking Bearings: Learn to take accurate bearings from the map and follow them in the field.
Back Bearings: Use back bearings to double-check your direction by turning the compass 180 degrees and aligning the compass needle with the orienting arrow.
Baseplate: The flat, clear, plastic part of the compass that usually has a ruler along one or more of its edges.
Direction of Travel Arrow: An arrow on the baseplate that points in the direction you want to travel.

Orienting Arrow: An arrow inside the compass housing that you align with the magnetic needle.
Magnetic Needle: A needle that points to magnetic north.
Rotating Bezel: A ring around the compass housing with degree markings.
Be aware of the difference between true north and magnetic north. Some compasses allow you to adjust for this declination.
NOW, Lets break that down a bit further....
The difference between true north and magnetic north is known as magnetic declination. True north is the geographic North Pole, the point at which the Earth's axis intersects its surface. Magnetic north, on the other hand, is the direction a magnetic compass points towards—the location of the magnetic pole.

The Earth's magnetic field is not uniform, and the magnetic north pole is not at the same location as true north. The angular difference between true north and magnetic north is called magnetic declination. This declination value varies based on your location on the Earth's surface and changes over time due to the movement of the Earth's magnetic poles.
There are three possible situations regarding magnetic declination:
Zero Declination: If the lines of longitude and magnetic meridian align, the declination is zero, and a compass will point directly to true north.
East Declination: If the magnetic meridian is to the east of the lines of longitude, there is east declination. In this case, a compass will point east of true north.
West Declination: If the magnetic meridian is to the west of the lines of longitude, there is west declination. In this case, a compass will point west of true north.
To navigate accurately with a compass, you need to be aware of the local magnetic declination for your specific location.
Maps often include information about magnetic declination, and you can also find this information from various sources, including online magnetic declination calculators or by checking with local geographical or geological authorities.
Some compasses allow you to adjust for magnetic declination, allowing you to set the declination value so that the compass indicates true north instead of magnetic north.
This adjustment is crucial for precise navigation, especially in areas with significant declination. If your compass does not have an adjustable feature, you'll need to mentally account for the declination when using the compass in navigation.

1. Orient the Map:
2. Hold the Compass:
3. Rotate the Bezel:
4. Place the Compass on the Map:
5. Read the Bearing:
6. Transfer the Bearing to the Field:
7. Follow the Bearing:
Additional Tips:
Back Bearing: To double-check your direction, you can take a back bearing. Turn the compass 180 degrees and align the compass needle with the orienting arrow. The direction of travel arrow now points back along your original bearing.
Adjusting for Declination: If your compass has an adjustable declination feature, set it according to the local declination before taking a bearing. This ensures that the bearing is referenced to true north instead of magnetic north.
Use Landmarks: Along your bearing, look for prominent landmarks or features that you can use to stay on course.
Pacing: Combine compass navigation with pacing to estimate the distance you've traveled along the bearing.
Remember to practice taking bearings in different environments to become comfortable and proficient in using your compass for navigation. Regular practice will enhance your skills and confidence in the field.

Scale: The scale of the map indicates the relationship between the distances on the map and the corresponding distances on the ground. For example, a scale of 1:24,000 means one unit on the map is equal to 24,000 units on the ground.
Contour Lines: Contour lines represent the elevation of the terrain. Each contour line connects points of equal elevation. Close contour lines indicate steep terrain, while widely spaced lines represent gentle slopes.
Index Contours: Index contours are thicker contour lines labeled with the elevation. These lines help you quickly identify the elevation of the land.
Contour Intervals: The contour interval is the vertical distance between adjacent contour lines. It is usually indicated in the map legend.
Topographic Symbols: Symbols on the map represent features such as rivers, roads, buildings, and vegetation. The legend provides information about these symbols.
Scale Bar: The scale bar is a graphical representation of distance on the map. Use it to estimate distances between points.
Legend: The legend explains the symbols and colors used on the map. It provides valuable information about the features represented.
Grid Lines: Some maps have grid lines, such as the Universal Transverse Mercator (UTM) grid or latitude and longitude lines, to help with precise location.

1. Understand the Scale: Examine the scale to determine the relationship between map distance and actual distance.
2. Identify Contour Lines: Locate contour lines on the map. Follow the lines to understand the shape and elevation of the terrain.
3. Recognize Features: Use the legend to identify symbols representing natural and man-made features such as rivers, roads, and buildings.
4. Determine Elevation: Identify index contours and use the contour interval to estimate elevations.
5. Orient the Map: Align the map with the actual terrain using a compass. Ensure the top of the map corresponds to true north.
6. Plan a Route: Use the map to plan a route based on your destination, avoiding steep terrain or obstacles.
7. Use Grid Coordinates (if applicable): If the map has a grid, use it to determine your location and navigate more precisely.
8. Consider Slope and Aspect: Contour lines close together indicate steep slopes, while lines spaced farther apart represent gentler terrain. Determine slope aspect (the direction a slope faces) based on contour lines.
9. Practice Landmark Recognition: dentify prominent landmarks to aid in navigation.
Reading a topographic map becomes easier with practice. Start with simple maps and gradually work your way up to more complex terrains. Regular practice in the field will enhance your navigation skills and familiarity with map interpretation.
In reality, GPS's will be a luxury and not reliable especially after some catastrophic disaster such as an EMP, Solar Flare, etc. However, until then, we will go over som basic functions of a GPS in order to assist you in your journey.
NOTE: It is HIGHLY Recommended you become familiar with compass and maps as those will be the longest lasting and most consistent way of land navigation until times end.
Turn on the GPS: Power on the GPS device and wait for it to acquire satellite signals.
Satellite Signal Acquisition: Ensure you are in an open area with a clear view of the sky to help the device quickly acquire satellite signals.
Select or Input Waypoints: Input your destination or waypoints into the GPS. You can enter coordinates directly or choose from pre-loaded points of interest.
View Your Location: The GPS will display your current location on the screen, often as coordinates (latitude and longitude).
Follow the Navigation Screen: Many GPS devices provide a map display with your position and a route to your destination. Follow the on-screen instructions.
Waypoints: Set waypoints for important locations. This could be your starting point, campsite, or any other point of interest.
Routes: Plan and create routes by connecting waypoints. The GPS will guide you along the designated path.
Tracks: Some GPS devices allow you to record your track, essentially creating a digital breadcrumb trail of your route. This can be useful for retracing your steps.
Navigation Screens: Familiarize yourself with different screens on your GPS, including map view, compass view, and data screens showing details like speed, distance, and elevation.
Coordinate Systems: Understand the coordinate system your GPS uses (e.g., latitude and longitude, UTM). Ensure your GPS settings match your map's coordinate system.
Marking Waypoints: Mark waypoints as you go. These could be notable landmarks, junctions, or any other feature you may want to revisit.
Altimeter and Barometer: Some GPS devices have altimeter and barometer functions. They can provide information about your altitude and help predict changes in weather.
Battery Management: Be mindful of your GPS's battery life. Carry spare batteries or a portable charger for longer trips.
Practice Before Your Trip: Familiarize yourself with your GPS device and its functions in a controlled environment before relying on it in the field.
Carry Paper Maps: While GPS is a powerful tool, always carry paper maps as a backup. Electronics can fail or run out of battery.
Calibrate Compass: If your GPS has a compass function, calibrate it regularly for accurate readings.
Stay Updated: Keep your GPS device's firmware and software up to date for optimal performance.
Understand GPS Limitations: GPS signals can be affected by terrain, dense foliage, or tall buildings. Be aware of these limitations.
Plan for Emergencies: Have a backup plan and know how to navigate using traditional methods in case your GPS fails.
Remember that while GPS technology is powerful, it's essential to combine it with traditional navigation skills. Always use your best judgment, stay aware of your surroundings, and be prepared for unexpected situations when navigating in the outdoors.
Thank you for taking the time to go through this and better yourself with one of our core values, "Never Stop Learning" Taking the time to read and practice these steps put you in a class above 75% of the populations of possible survivors. Survive in confidence knowing you are doing what it takes to not only survive, but also thrive.